OAuth2 Proxy With Azure Ad
OAuth2 Proxy is a great way to easily secure internal company applications that are running on Kubernetes. We host a few simple applications - helpers really - that need some form of authentication to prevent anyone who has network access from accessing the site. Building the auth flow into the application would be ideal but when the application already exists and you need a quick solution…
Since our company uses Azure AD, oauth2-proxy can be configured to force all traffic hitting the application ingress to authenticate against Azure AD.
Azure AD App Registration⌗
To use Azure AD for your authentication you first need to create an application in your Azure AD tenant. The guide below assumes you have permissions to create all the required elements.
-
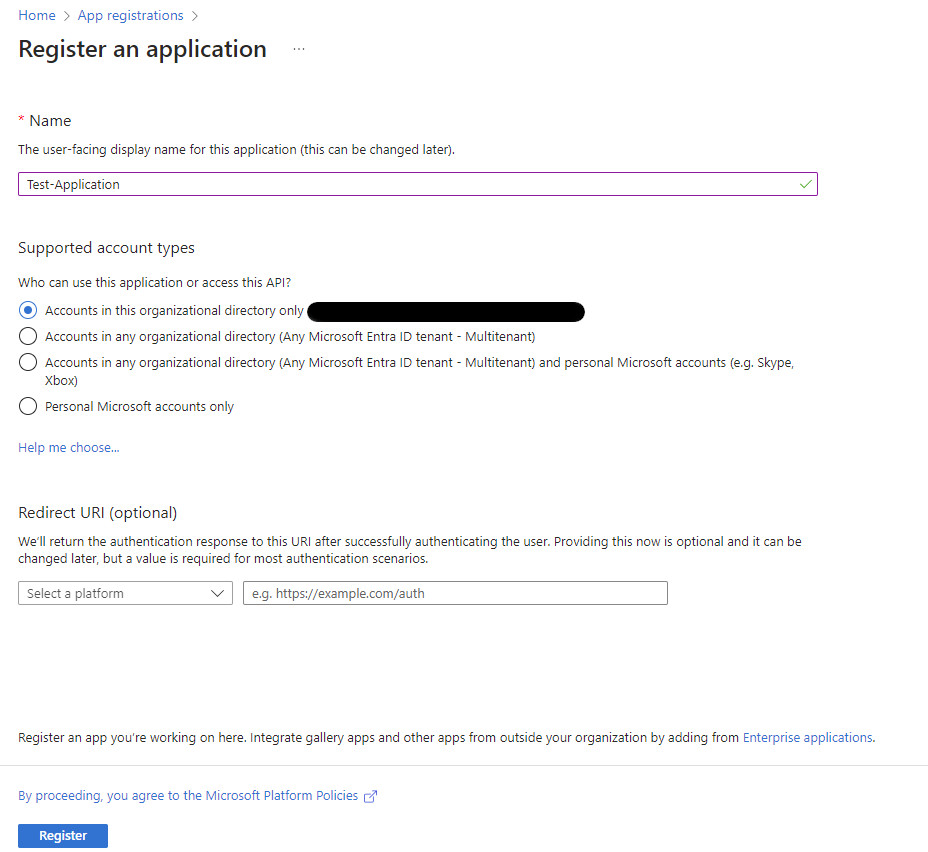
Open the Azure portal and go to App registrations
-
Select New registration
-
Give your app a name - this name will be seen by the user when logging in so make it meaningful
-
Click Register
The portal will now open you application, the next steps are to configure your application
-
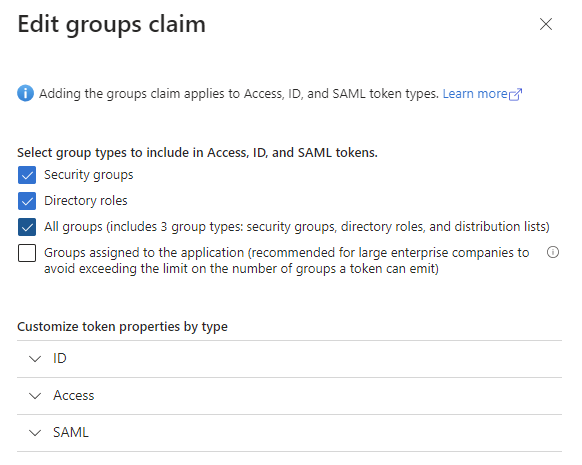
Navigate to Token configuration from the left menu
-
Select Add groups claim
-
Select All groups and click Add
-
Navigate to Certificates & Secrets from the left menu
-
Select New client secret
- Enter a description and select a suitable expiry time
-
Copy the Value and save it for later - you cannot see this value again so be sure to save it
-
Navigate to Overview from the left menu
- Copy the Application (client) ID
- Click Endpoints and copy the value for OAuth 2.0 token endpoint (v2)
oauth2-proxy Helm Chart Instructions⌗
My preferred way of deploying application to Kubernetes is using helm charts. You don’t have to use a helm chart to deploy oauth2-proxy - the configuration will be the same no matter how you decide to deploy it.
From the above App Registration you should have recorded the
- Application (client) ID
- Secret Value
- OAuth 2.0 token endpoint (v2)
For the OAuth 2.0 Token, you do not need the full url. The url only needs up to the /v2.0 point:
These values are all required by oauth2-proxy when communicating with Azure AD. The instructions below will show you how to deploy the oauth2-proxy helm chart for your application and test that it works with Azure AD.
-
Add the helm repo
-
Generate a cookie secret for oauth2-proxy, you can use bash for this, or follow the instructions for other methods like Python or OpenSSL:
-
Create a
values.yamlfile that will be used to configure the helm chart. There are several configuration values that need to be populated for oauth2-proxy to work in you environment. The values listed below are the key requirements, anything beyond this is up to you. For a full overview of all the settings passed to theconfigFilefield, have a look at the documentation:clientIDclientSecretcookieName- keep this unique to each deploymentcookieSecret- generated aboveconfigFile-oidc_issuer_url- this is your tenant login urlconfigFile-cookie_domains- this is unique to your application environmentconfigFile-whitelist_domains- allowed domains for redirection after authentication
-
The above config is missing the ingress portion. You will still need to add a suitable ingress for your application, for example:
-
Deploy your application using helm
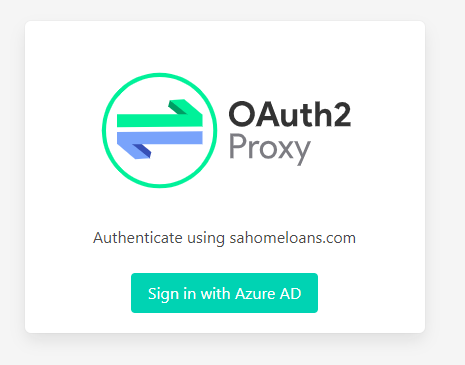
You can test your application by opening the ingress url in a browser. A working proxy will present you with a login screen
Adding the oauth2-proxy to an application⌗
`nginx-ingress`` has annotations that cater for a auth redirects on ingress. When added, nginx will force all traffic to the authentication url before passing it on to the application. This is a simple way to ensure no unauthorised traffic hits your application.
For this to work you need
- The external url of your authentication proxy
- The internal service url accessible in the EKS cluster
The internal url follows the usual Kubernetes naming scheme of:
<service name>.<namespace>.svc.cluster.local
By way of example, these annotations were added to an internal only application that needed Azure AD authentication. You can edit the auth-* fields and server-snippet to suite your application.
Limiting group access⌗
To limit access to an application to only the assigned users or groups, you need to enable the explicit assignment feature of the application.
From the Azure portal:
-
Open the Enterprise Applications page
-
Search for your application and open it
-
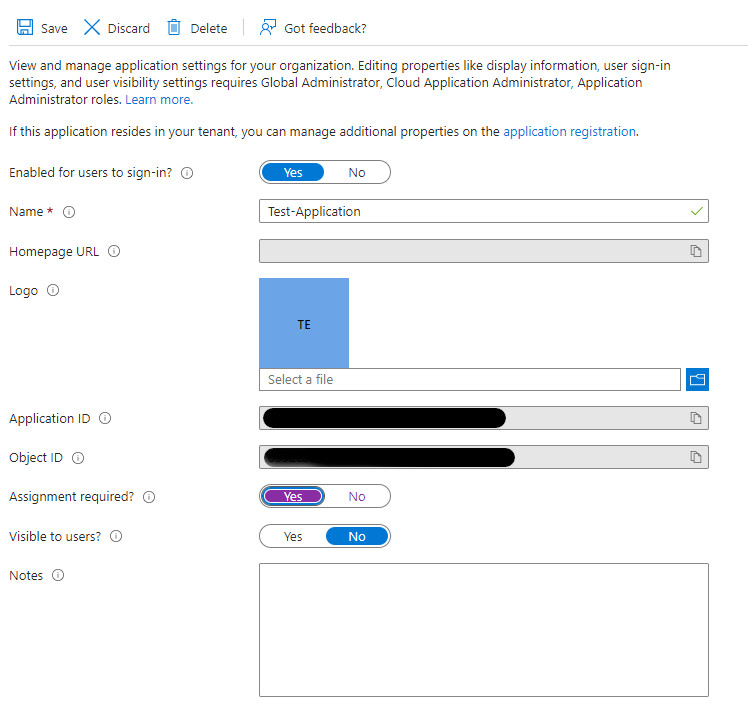
From the left menu select Properties
-
Change the Assignment required? field to Yes and then hit Save
-
Select Users and Groups from the left menu
- Select Add user/group and then add the users or groups who will have access
To test the above configuration, leave yourself out of the users/groups with access and try access the application. You will be prompted to login but then denied access by Azure AD.
Final thoughts⌗
If you’ve read this far, thank you! You have probably also figured out that this is not a good long term solution, but this is a great stop gap for getting authentication in front of applications that started as a quick fix and are now business critical.
Using this setup you have oauth2-proxy ready for the next stage of authentication, it will pass the roles like admin or read_only assigned to a user, or group of users, and the application can then use that to assign privileges/roles internally.
You just need to decipher the groups passed by Azure AD that arrive in the X-Auth-Request-Groups header…